How to fix a broken post.
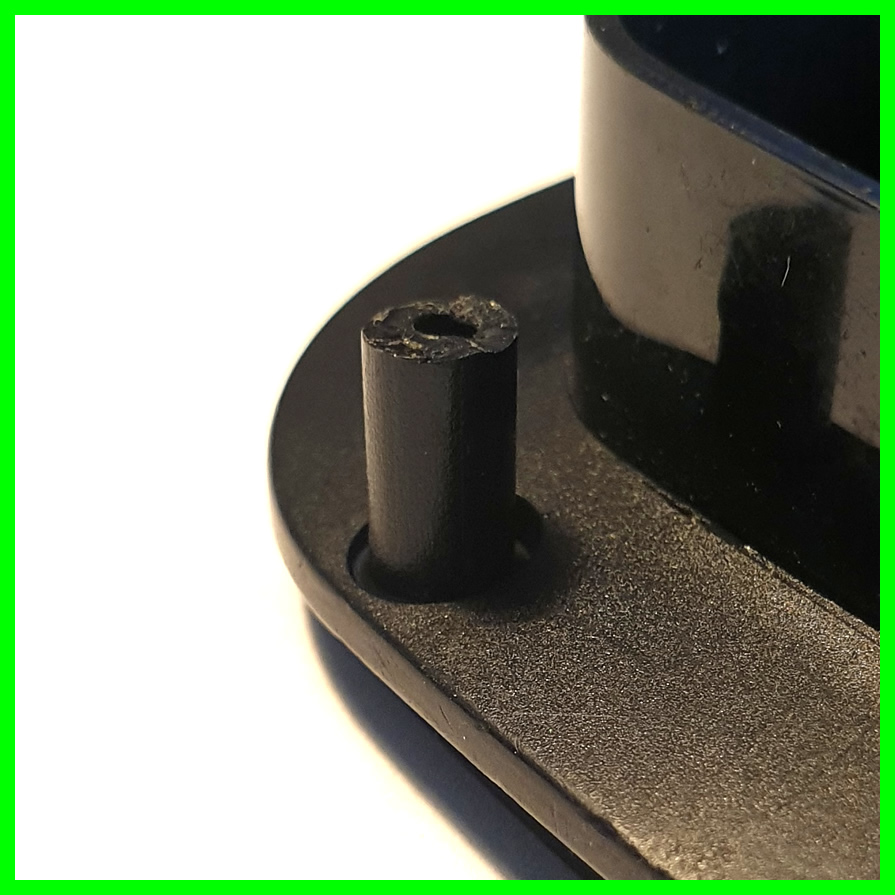
Can you use the broken post?

If your post has broken off at the base like this one then you might be able to use the existing post to fix the headset. Don't remove the clear "light up" cap. Skip straight to step 2.
Remove the ear-cushion/muff, unscrew the speaker, remove a section of wall then drill through the black plastic shell and into the broken post with a 2mm bit. Finally secure the broken post with a screw.
If not...
If you can't save the post then you can use one of our 3D printed replacements to fix your headset. Replacement posts are secured by a screw from the other side of the black plastic shell. This page will guide you through the steps needed to fit them in a variety of cases.
Step 1
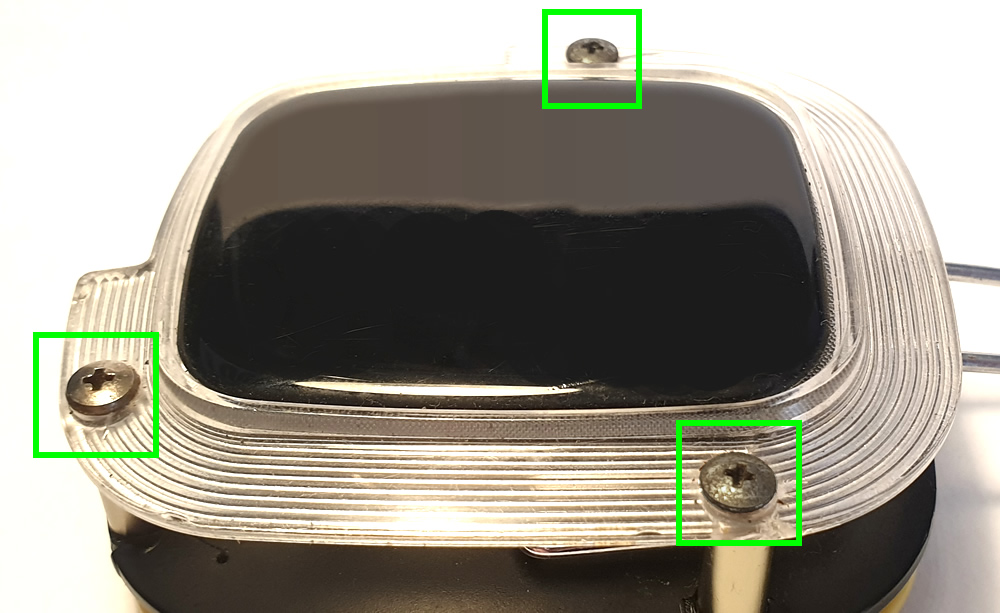
Remove the 3 silver screws that hold the clear “light up” cap on. If one of the posts is broken then that screw may not undo properly but you should still be able to remove the cap. If any of the posts on this headset have been repaired before you may have to remove the ear-cushion/muff and unscrew the speaker before you can remove the cap.
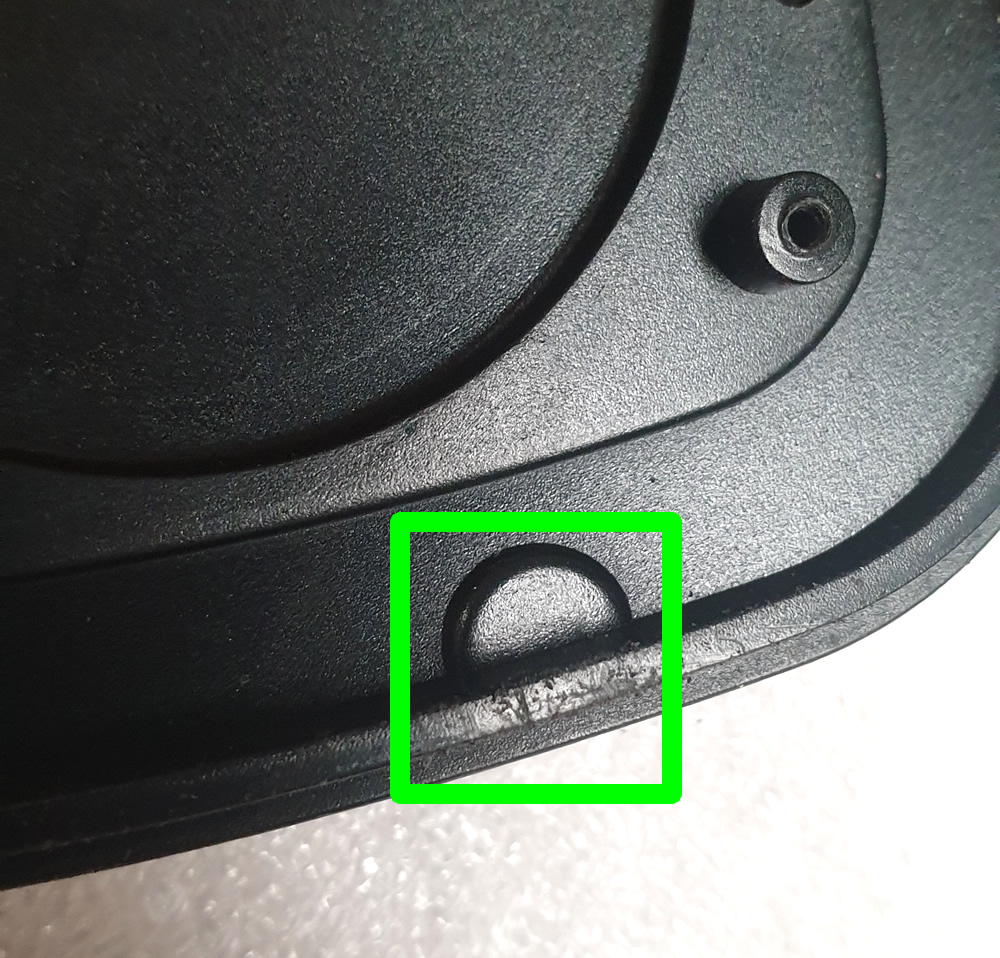
After you slide off the outer metal tube from the damaged post you will be able to survey the damage. Posts tend to break in one of three ways as shown here.
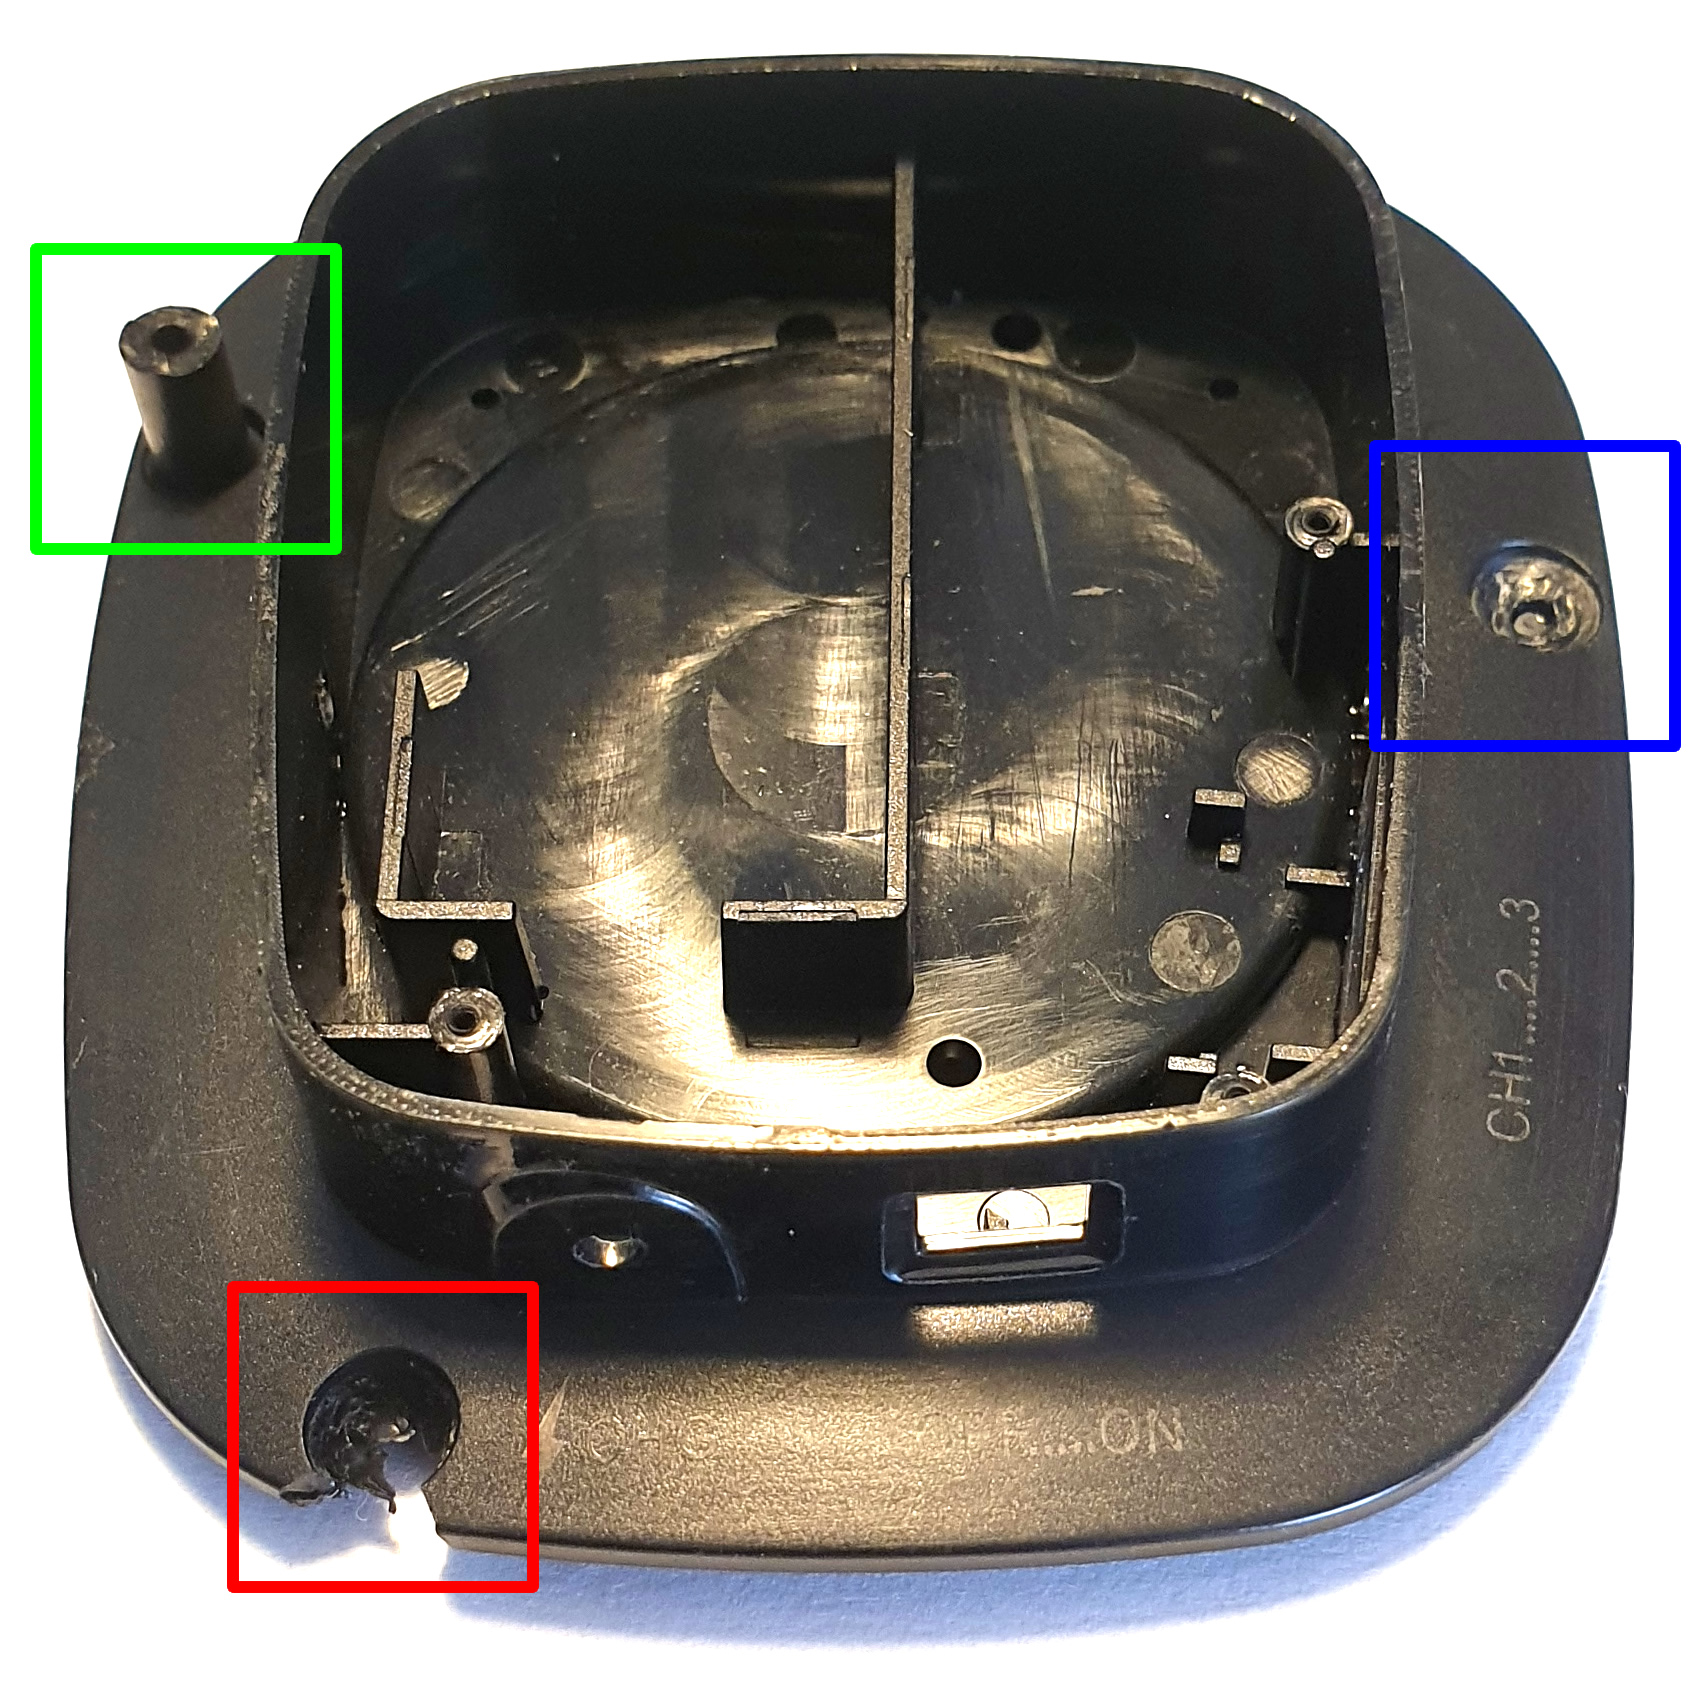
BLUE BOX
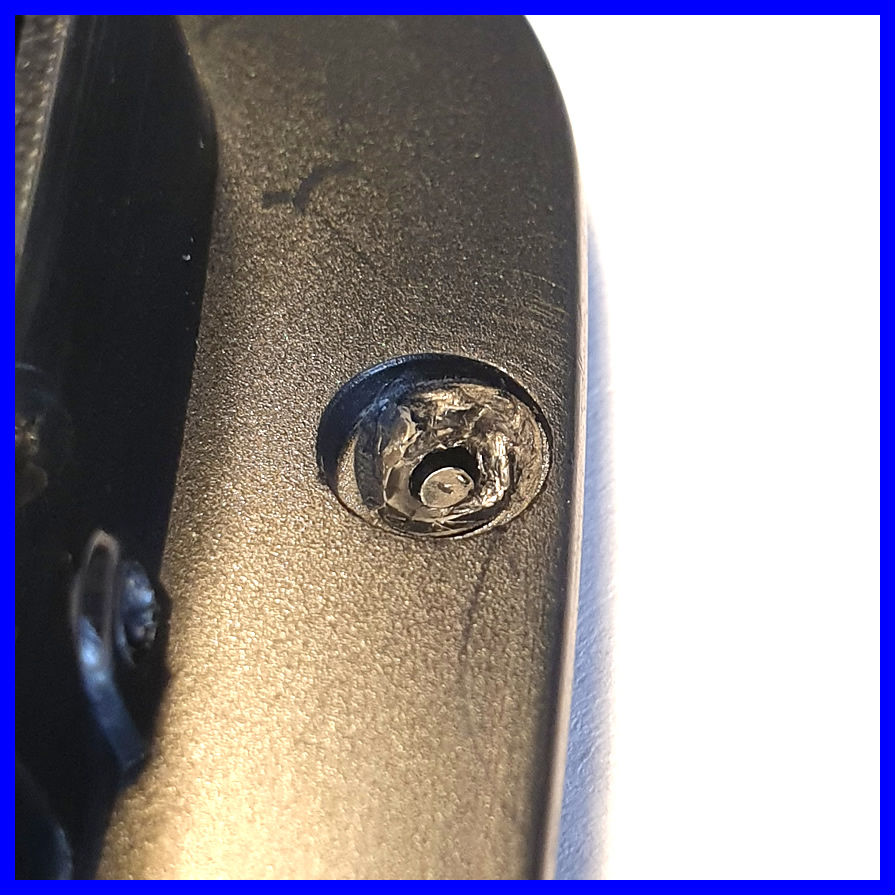
If the post has snapped off at the base then you can move straight on to the next step of the repair.
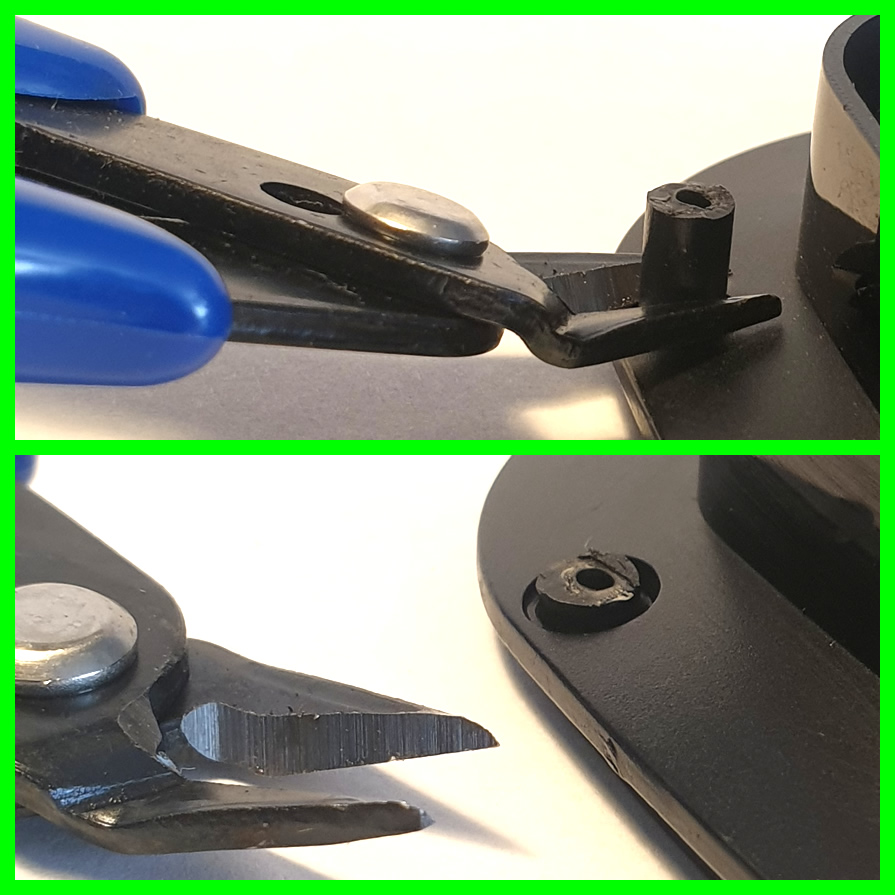
GREEN BOX
If part of the post remains then you will need to remove as much as possible. We find it best to use a sharp pair of snips or wire cutters but you can also use a small hack saw blade. Watch your eyes tho as the post can ping off when cut. Eye protection should be worn. Once that is done you can skip straight to the next step of the repair.
RED BOX
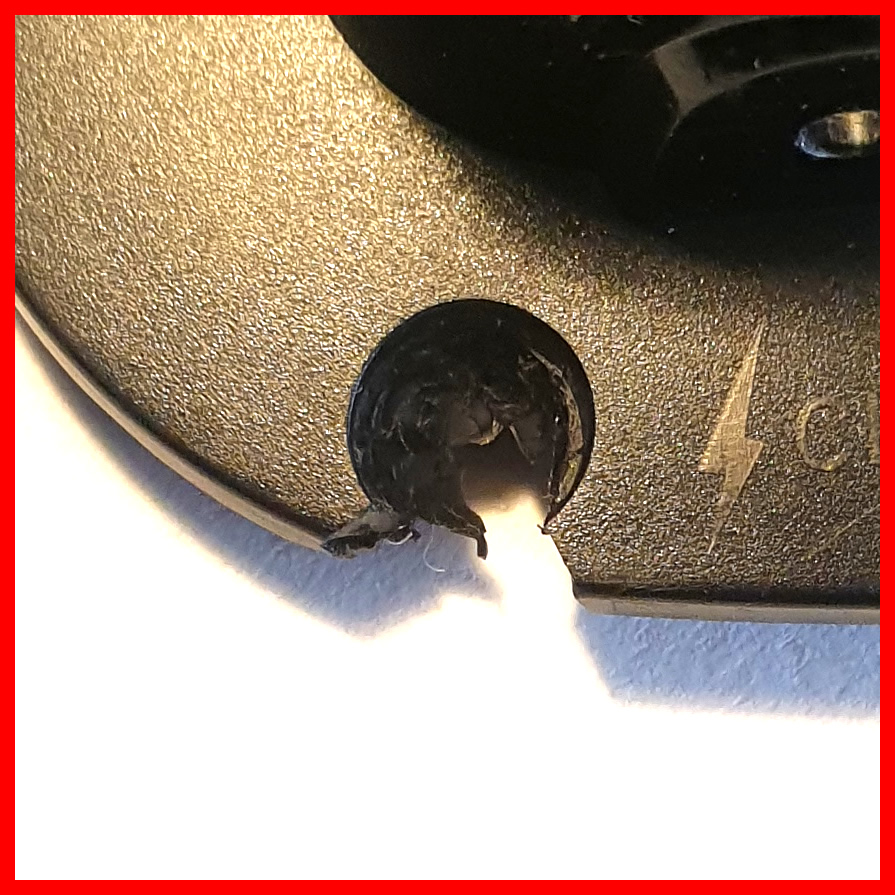
If the edge of the black plastic shell has been damaged then you will not be able to fit one of our 3D printed posts. We will be bringing a product to market in the near future to fix these headsets. please put them aside and send us a message if you are interested in updates on release dates etc.
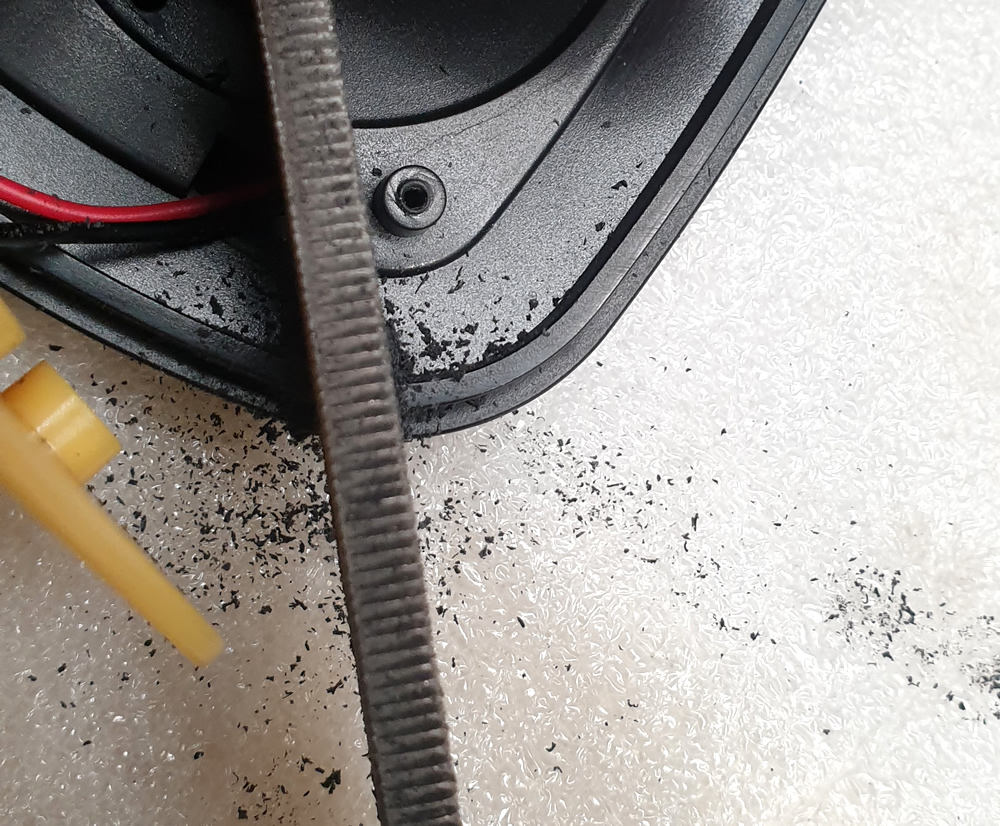
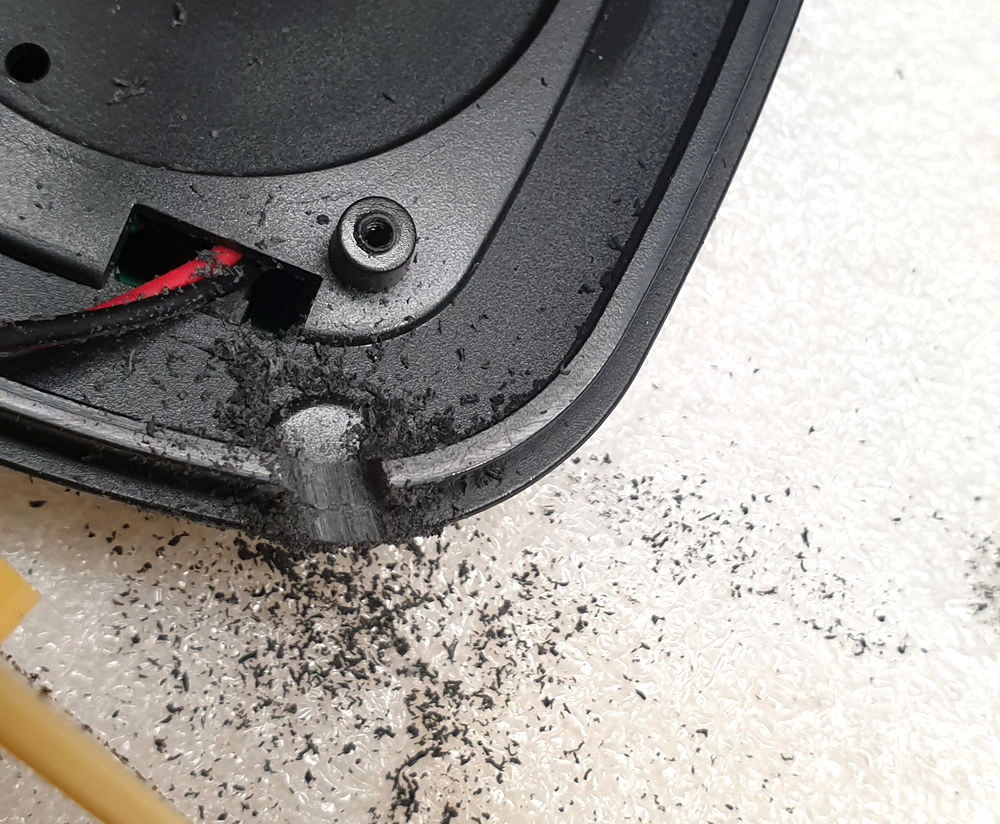
Step 2
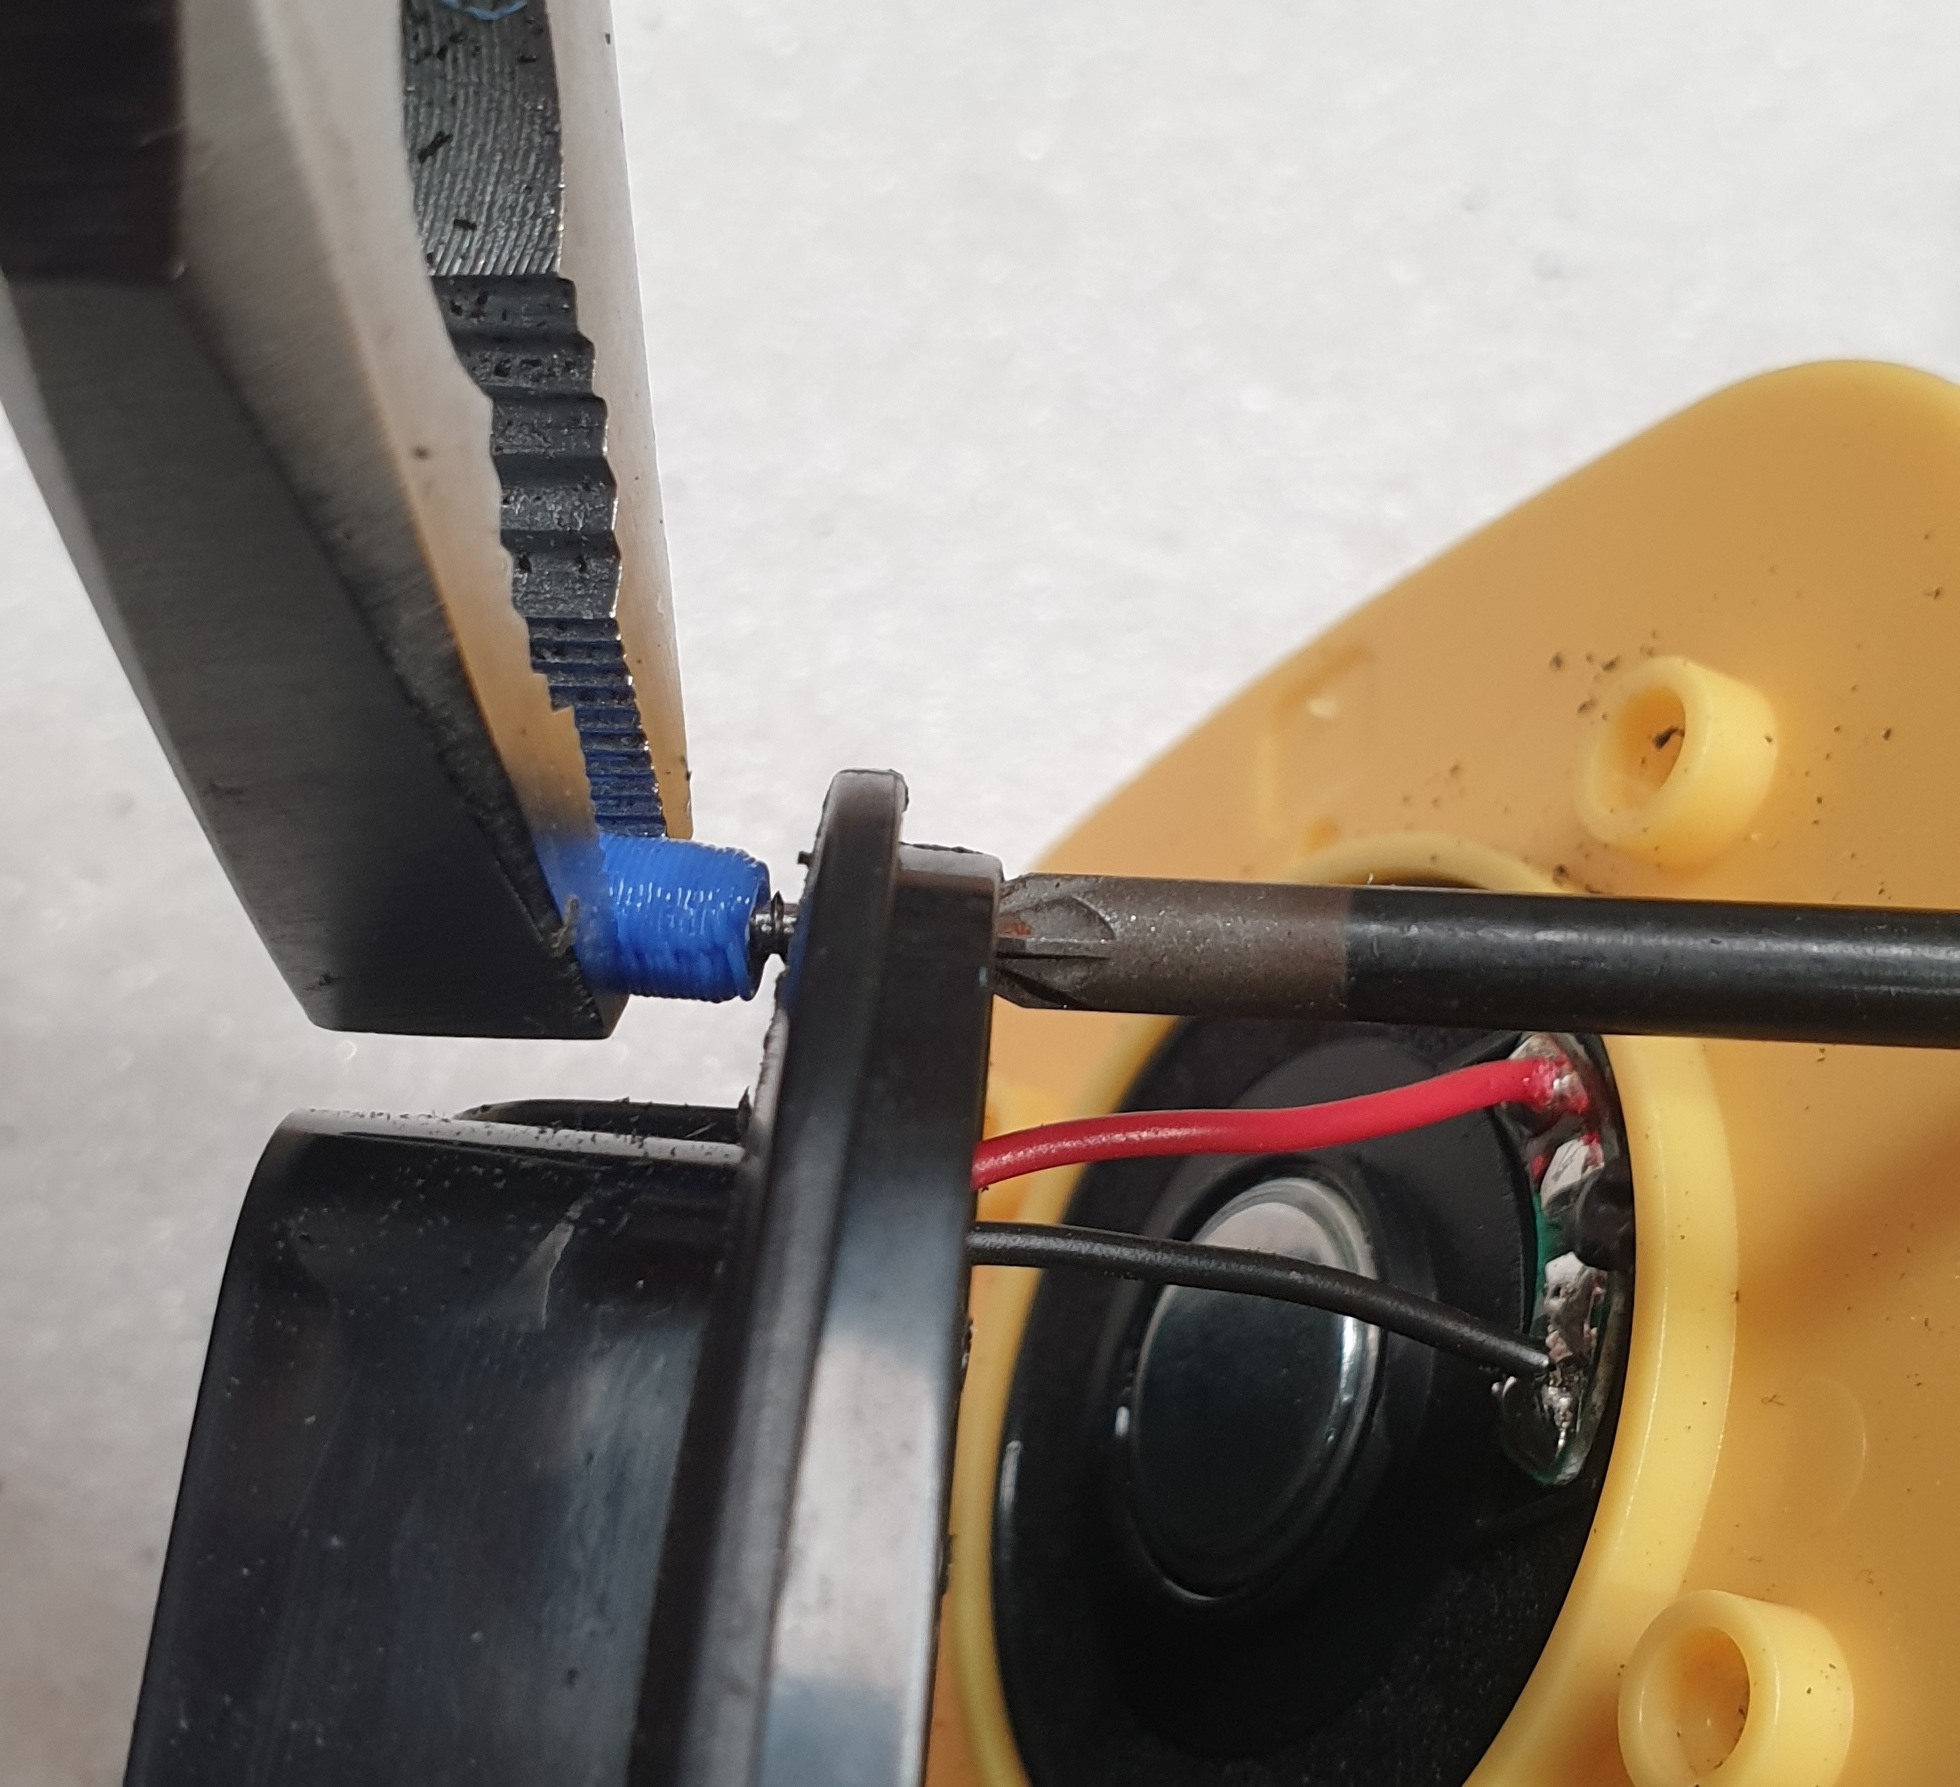
Now remove the ear-cushion/muff and detach the speaker. There are 4 little black screws holding it in place. We usually keep the wires connected to the speaker but you may find it easier to unsolder them in some cases.
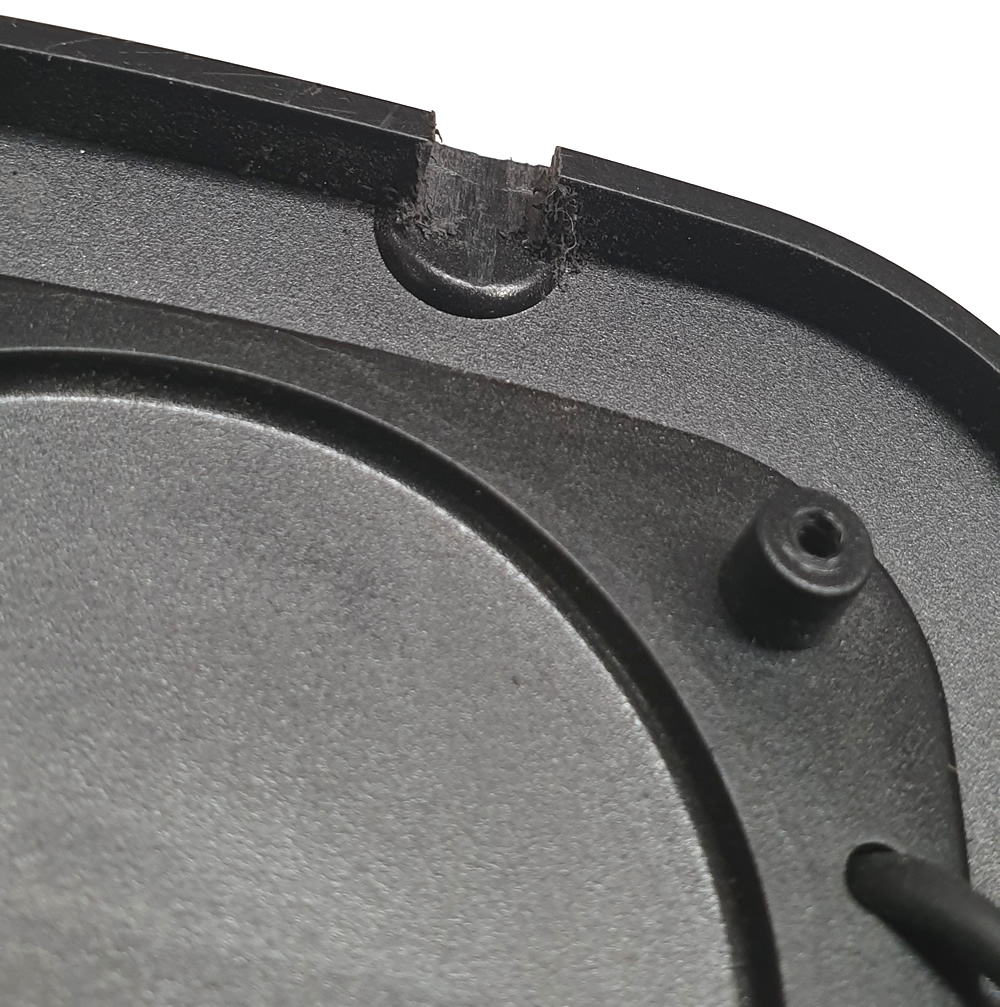
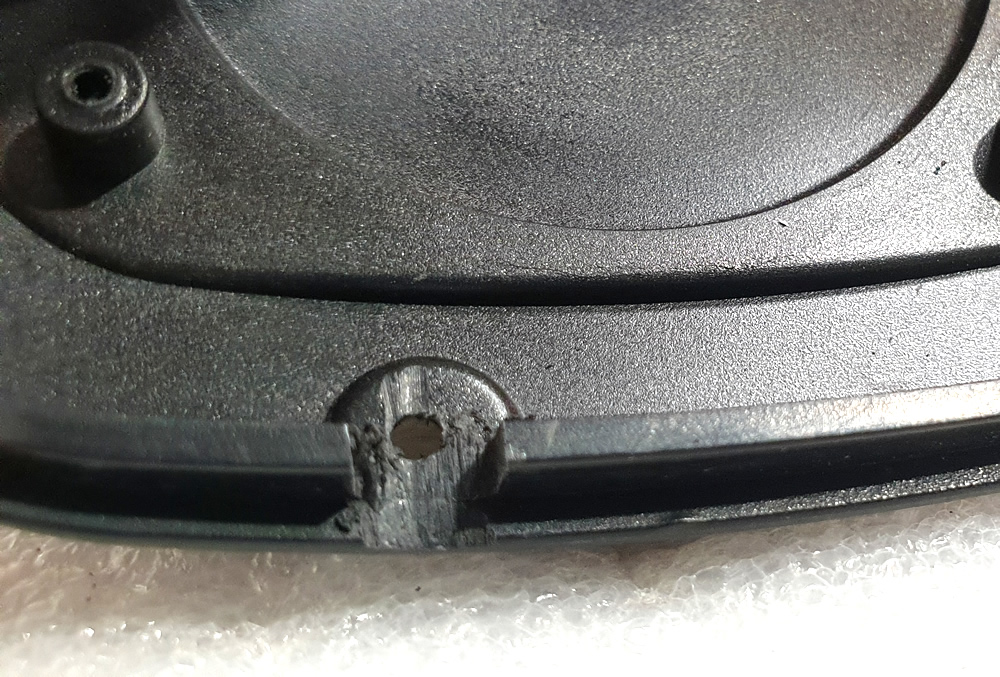
With the speaker removed locate the round raised pad behind the broken post. The screw will go through the centre of this pad so we need to remove a section of the wall to make space for the head of the screw.
We find it best to use the thin edge of a flat file to remove a section of the wall. This gives most control and reduces the chances of cracking the black plastic and damaging it further. Be careful not to damage the little towers that the speaker screws go into. The plastic "dust" given off is pretty nasty if you get it in your eyes so suitable eye protection should be worn.
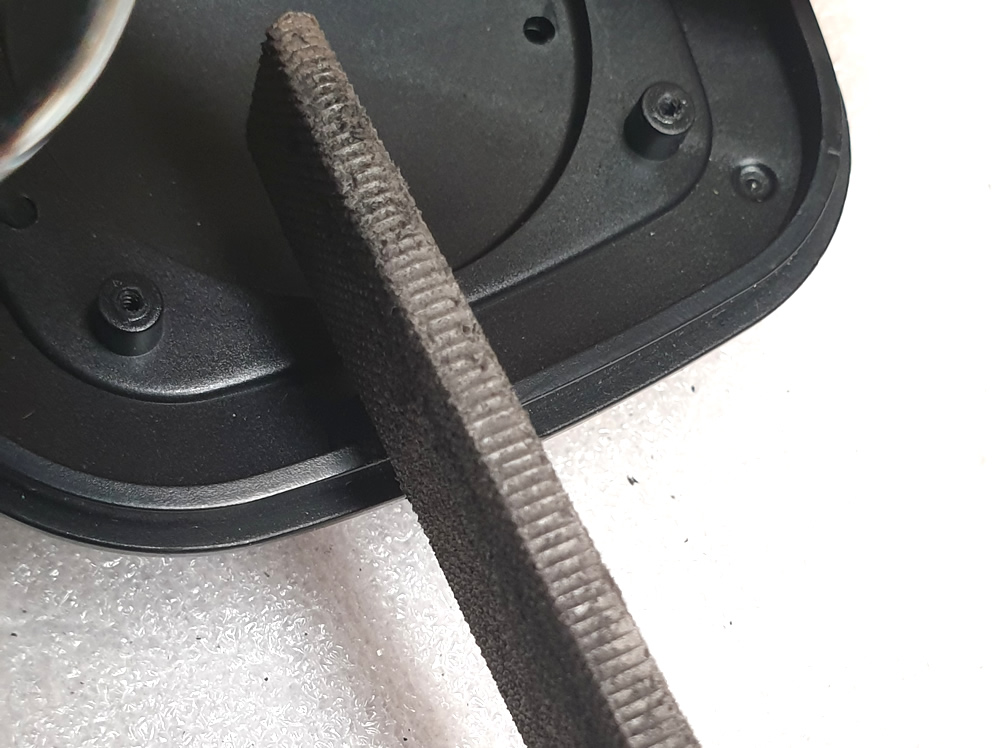
These corner ones next to where the speaker wires come through are the most challenging. You may find it easier to de-solder the speaker while you fit the post. You can use a paint brush or similar to brush off the loose plastic dust.
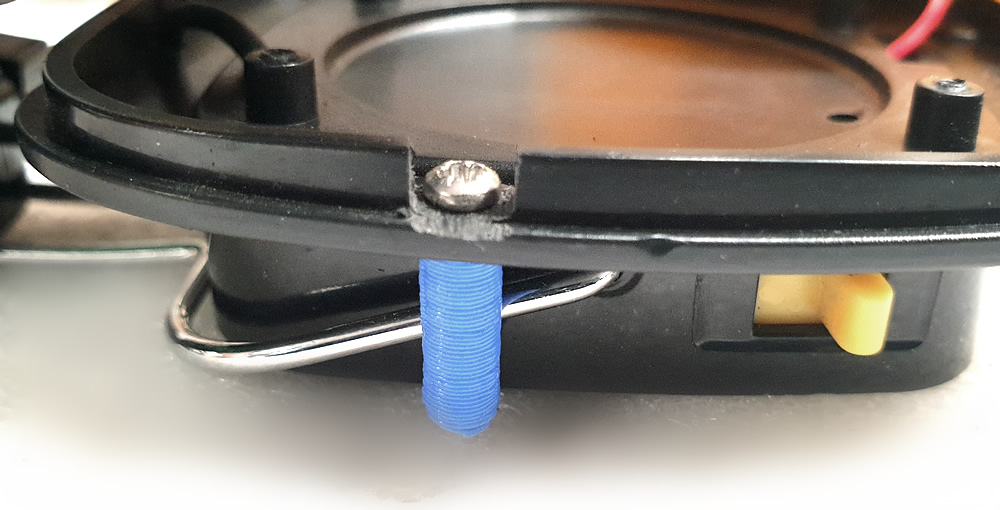
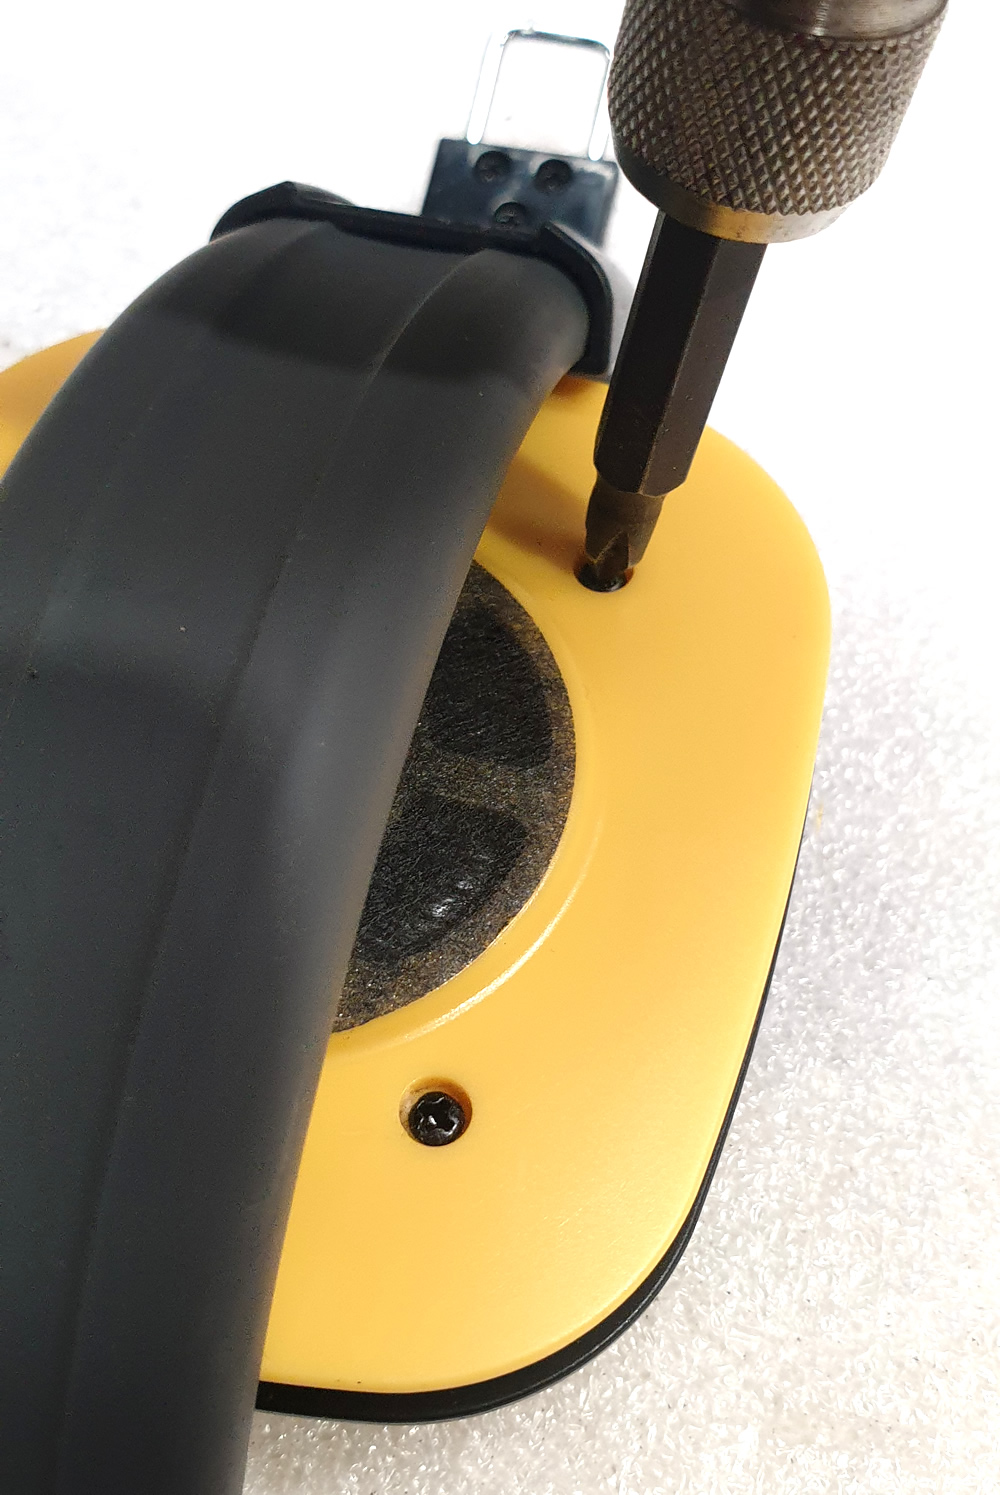
Step 3
Now we have to drill a hole to put the screw through. We think a 2.5mm drill bit is best (2mm if you are drilling a pilot hole into a post). We want the hole to be in the centre of the raised pad.
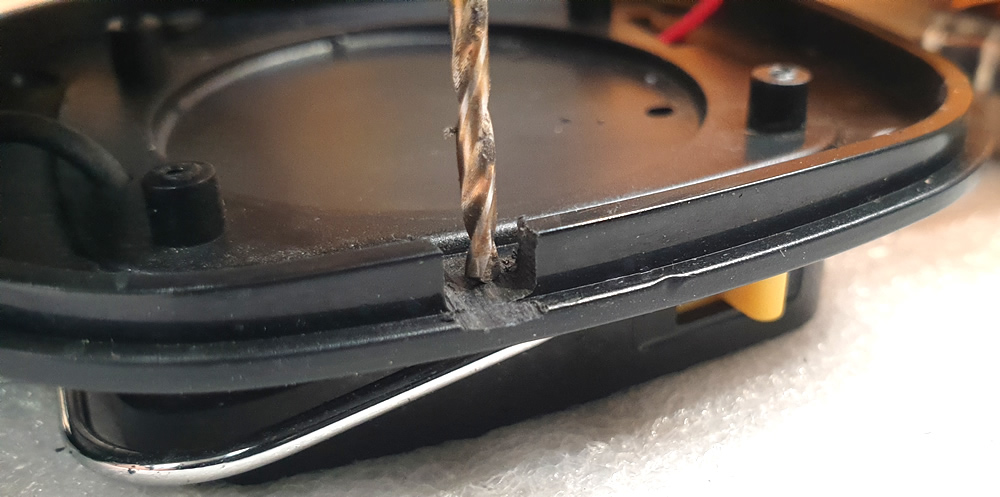
If there is a little bit of post remaining then it may be easier to drill from the other side as you can line it up with the hole in the centre of the broken post.
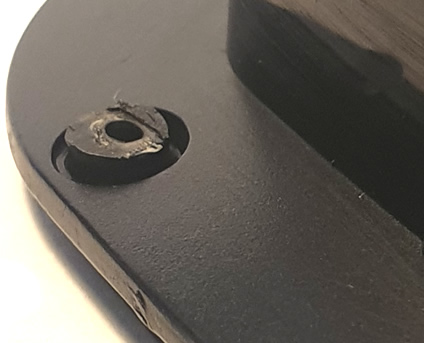
Step 4
Then we just need to secure a replacement post with a screw.
You can buy the perfect screw here.